Firebase multi-site deployment with CircleCI


A long time ago, even the simplest of build and deployment scenarios through a CI/CD pipeline were something that was out of reach for many developers, and smaller teams.
It was often the matter of the cost of having an adequate build server, or the complexity of setting everything up, even though you had great solutions like Jenkins which were free to use.
Even if you had the experience and all requirements to make it happen, it could be quite a chore to set up and maintain, making it an overhead for smaller projects, unless a dedicated team member like a DevOps engineer was available to tackle such tasks.
However, a lot of things have changed lately, as such solutions became relatively cheap and highly available. Probably all git providers now support pipeline builds, and there are a lot of dedicated hosted CI/CD solutions available out there.
This made it cheaper than ever and accessible even to developers with limited or no infrastructure knowledge. One of such solutions is CircleCI.
A journey to deploy a static website
The smallest of projects are usually the ones that most often end up being dropped to the server via ssh, RDP or FTP. And usually, these are static websites, regardless of the framework.
This doesn’t take a lot of time … when you do it once. But it gets tedious over time. But don’t settle for tedious, when it can be magical. And focus on what you want to do, which is hardly moving locally built assets around.
Firebase Hosting
There are a lot of great options for static page hosting, like Netlify, but we prefer hosting our projects with Firebase, for the following reasons:
- great CLI
- SSL certificate out of the box
- almost zero config
- great performance
- free or very cheap for most scenarios
- supports multi-site deployment (dev, prod, staging for example)

You can read more about it in the official docs.
Setting up the first environment on Firebase
- Create a Firebase account, or use your existing Google Account to log in.
- Create a new project
- Go to the Hosting tab
- Click on Get started button
Follow the instructions given by firebase, except firebase deploy, which is not necessary at this point.
After init inside your project, you will see the following inside your terminal:
You're about to initialize a Firebase project in this directory:

/some-path/deploy-me-softly

? Which Firebase CLI features do you want to set up for this folder? Press Space to select features, then Enter to confirm your choices.
 ◯ Database: Deploy Firebase Realtime Database Rules
 ◯ Firestore: Deploy rules and create indexes for Firestore
 ◯ Functions: Configure and deploy Cloud Functions
❯◉ Hosting: Configure and deploy Firebase Hosting sites
 ◯ Storage: Deploy Cloud Storage security rules
Select the hosting (space), and hit enter.
You will now get a list of your projects, select the one that you will use for hosting.
You will also see an option to create a new project in the CLI. Depending on your permissions (especially if you are inside a google organization), it is possible to simplify the process by using the CLI to create a project, but this would lack some brevity on the purpose of the article itself.
After this, you will get a prompt that will require you to select a folder which will be the build folder of your app. For react apps it is the build folder by default:
=== Hosting Setup

Your public directory is the folder (relative to your project directory) that
will contain Hosting assets to be uploaded with firebase deploy. If you
have a build process for your assets, use your build's output directory.

? What do you want to use as your public directory? build
Finally, you will be prompted to select if you want the rewrite all URL’s to index.html file. If you are working with a SPA framework such as React, Angular or Vue.js the answer is generally yes.
? Configure as a single-page app (rewrite all urls to /index.html)? (y/N) yAfter the initialization process, you will be redirected to a page for the first of our environments.
You will get a test domain name for it based on the project name.
Also, inside your project, you will get two new files generated:
- .firebaserc
- firebase.json
The .firebaserc file holds the information about the firebase projects your repository is connected to. This file will be updated automatically by the CLI when we add other sites.
The firebase.json file holds the configuration for the build artefacts that we will deploy to our environments. The default says that we want to deploy everything from the build folder and ignore everything else, including the node_modules, which is fine. We will, however, need to update it to support multi-site deployment.
Setting up the rest of the environments on Firebase
At the bottom of the current environment page, under Advanced you will see an option of adding additional sites. It should look like this:

Click on the Add another site button. You will be prompted for a name.
The decision is up to you, but if you want to have some sane naming, I suggest something in the lines of suffixing the default environment with the environment purpose you want to have. Here is a potential example:
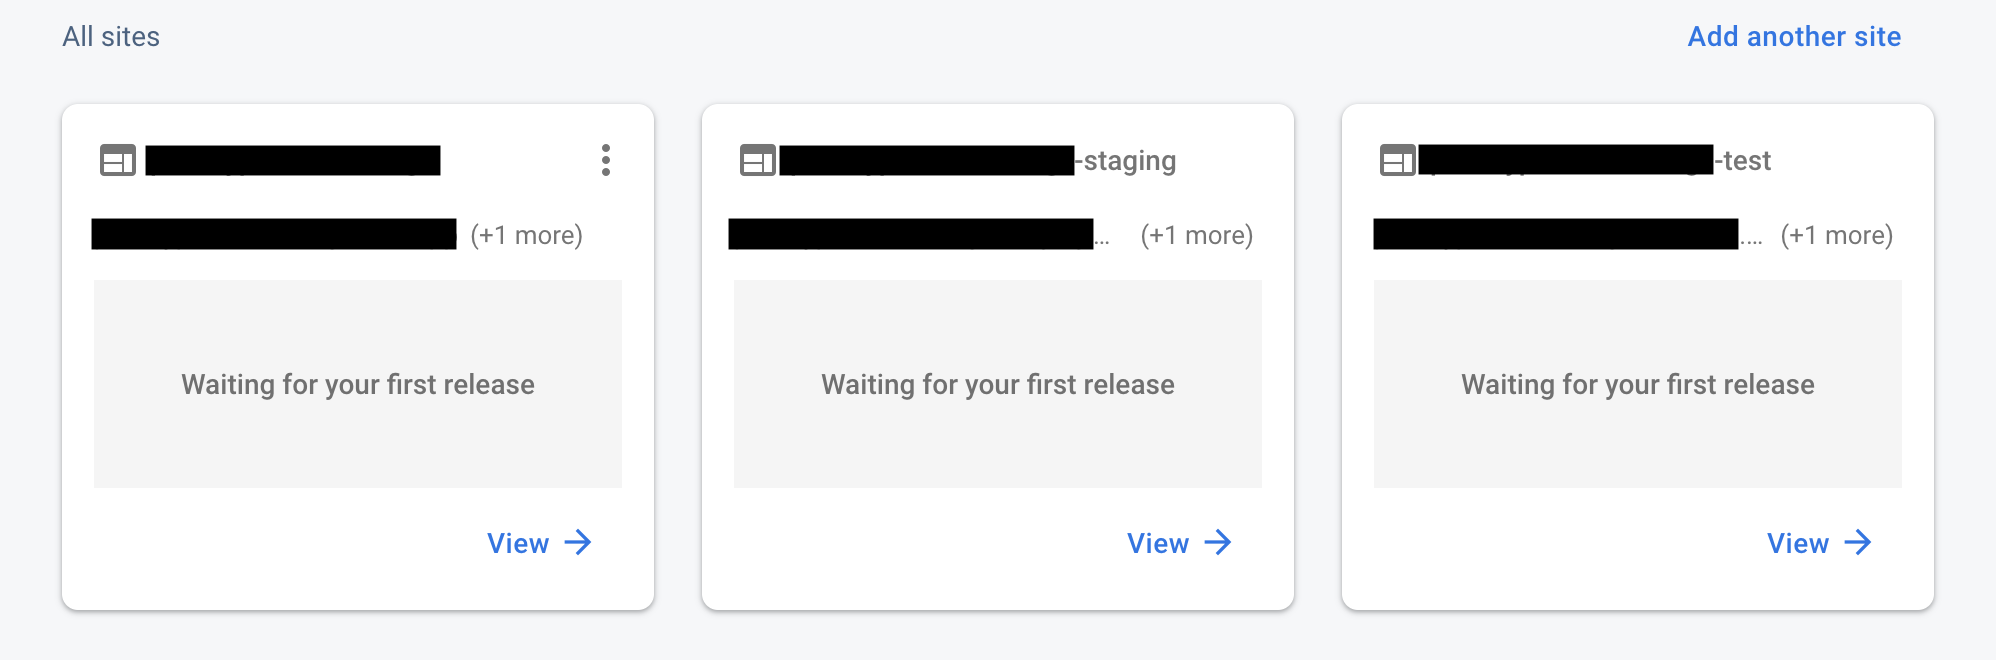
project-name.web.app // production (the default env you got)
project-name-staging.web.app // staging
project-name-test.web.app // test
After completing the process, you will get a screen that says all three are waiting for the first release.
Applying config targets
Next, we need to connect each site we created to a firebase deployment target.
firebase target:apply hosting test project-name-test
firebase target:apply hosting staging project-name-staging
firebase target:apply hosting production project-name
Executing these commands will update the .firebaserc file inside your project with aliases for each site in your project.
Your .firebaserc file should now match this template.
We also need to modify the firebase.json file.
The default config is based on only one website. You should change it to an array of object, with a configuration for each site. Your end result should look like this.
At this moment it is not possible to reuse the same configuration for each target in the config file, even if they are exactly the same, and have no target-specific differences :(.
Detailed official documentation can be found here.
Setting up git for multi-environment deployment
To define what will be deployed to each environment, we need to set up some form of a git process around it.
There are a lot of valid workflows, depending on what your solution will be. CircleCI can support build and deployment per branch or tag basis.
The following example does revolve around using GitFlow. A more in-depth look into what GitFlow is, and how to set up and use it with rebase can be found in one of my previous articles.
The short version:
- install git-flow (or use integrated one if you have SourceTree, Fork etc…)
- run git flow init command on your repo:
git init
git flow init
3. accept defaults, optionally prefix versions with v
After initialising git-flow inside our repository, you will now have the following branches set up.
master -> production
develop -> test
What about the staging environment branch?
Considering that the staging environment sits between test and production one, and its purpose is to be a replica of production, made for testing the code which will be pushed live after we confirm that it is ok, we will tie it to the release branches inside the git-flow.
These are intended to be short-lived branches for merging stuff between develop and master, without any additional code changes. If you think about it, the logic correlates with the staging environment purpose.
Setting up CircleCI
And finally, the magic sauce to blend it all together. CircleCI is an impressive tool, with a great feature set, documentation and compared to most other solutions, very easy to set up.
But why CircleCI compared to other solutions?
A valid question. Using the pipeline directly inside your repository is most probably the easiest solution for most people.
However, there are a few things that kinda make the CircleCI stand out as a solution:
- it’s a dedicated CI/CD solution, making it feature-packed when compared to the most integrated repository pipelines.
- great prebuilt docker images.
- integrates easily with your repositories upon sign up.
- the free plan includes (2core/4gb ram containers).
- has more credits included compared to most other systems or pipelines, which refresh weekly, making it a great starting solution even for small teams.
Let’s start
Note that the following steps use the current CircleCI interface. There is a new interface, which is quite nicer in active development but is still missing a lot of features.
- Create an account by signing up with GitHub or Bitbucket on https://circleci.com/
- After logging in, click on Add projects
- Click on the Set Up Project button next to your repository

On the next page, just make sure the Linux instance is selected, and continue to the next page, as we will use a custom config file to set everything up correctly.
After setting up a project, CircleCI will set up hooks on your repo, which will reference commits and pull requests during build time. The connection is two way, so you will have the information available in both CircleCI dashboard and your repository dashboard.
CircleCI config file reference
Everything tied to CircleCI deployment is done through its config file. While some people prefer tweaking stuff through an interface, from a development perspective, this is great, as it makes the project simpler and reusable, considering that you can simply copy the config from project to project.
The only thing you cannot skip is clicking the Set Up Project button next to your repository on the CircleCI interface.
A detailed reference on the config file can be found here. We will be using the 2.1 reference version.
Only a subset of the functionality is required for us to handle our case:
- executors
- commands
- jobs
- workflows
Executors are used for defining the environment in which our project will be built.
Commands are used for extracting all of the shared logic inside our steps to a single reference inside the config. They mainly help with reusability and keeping our config short and concise.
Jobs are used for defining step by step commands that we will run on our docker container used for build/deployment. Every job is a standalone step in the process.
Workflows are used to create the actual pipeline of jobs that will be run sequentially or in parallel.
Adding the config
First, create a .circleci/config.yml file inside your project.
You can find the complete configuration for this setup here.
This config includes all steps for build and deployment of our project, as well as caching steps to improve the package installation step for node_modules.
If you know how it can be improved further, drop a comment below the article. We are all here to learn, after all.
Adding the FIREBASE_TOKEN environment variable
In order for our build system to actually be able to deploy to our firebase targets, we need to give it permissions to do so. This is done by generating a ci token through the firebase CLI.
firebase login:ciAfter you execute the command, you will get a secure login prompt from google to log in to your account. After a successful login, you will get a token that CircleCI can use for authentication.
The token should look like this:
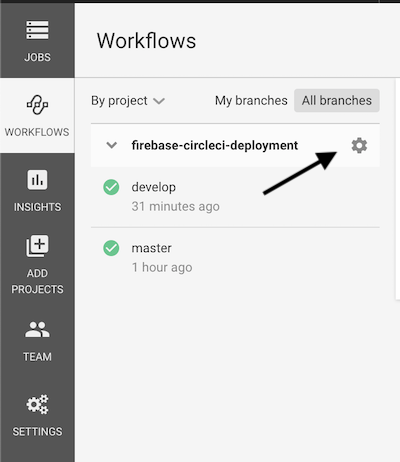
1//03_VJFNodJcOSCgYIARAAGAMSNwF-L9Irbsxpbkqc2adqgHPRfqxxxxxxxxxx-xxxxxxxxxxxxxxxxx-wIn order for the whole process to be secure, we cannot simply store the token to one of our configs or hardcode it. We will add it as an environment variable inside the CircleCI dashboard.
Under the workflows section, click on the little settings cog next to your project.
On the next page, select Environment Variables and click on the Add Variable button.
Set the following:
name: FIREBASE_TOKEN
token: 1//03_VJFNodJcOSCgYIARAAGAMSNwF-L9Irbsxpbkqc2adqgHPRfqxxxxxxxxxx-xxxxxxxxxxxxxxxxx-w
The token above is the one that you got from login:ci command.
In case you already have this set up for another project, you can simply import the currently used token, which will make the process even simpler.
Every journey needs to come to an end …
Now that we have set up everything, it’s time to test how it all works together.
Push on the develop branch should deploy the test site.
Push on any release/* branch should deploy the staging site.
Push on the master branch should deploy the production site.
If everything looks and deploys ok, it is suggested that you lock down your branches and allow only merge through code-reviewed PR-s to ensure that there won’t be any accidental deployments.
Code examples
You can find the code example of how everything fits together here:

Want to get in touch? Drop us an email at hello@prototyp.digital or visit us at https://prototyp.digital. Feel free to point out if something is incorrect or you have a better way of doing stuff, we’re all here to learn :) Thanks!