Change detection strategies in Angular
Learn how to apply different change detection strategies in Angular.

Angular is a robust web framework with a remarkable feature known as change detection. In essence, it automatically detects changes in an application’s data and updates the view accordingly. This feature is crucial to any Angular application.
But what’s not that widely known is that there are different strategies you can use to optimize the performance of change detection.
In this article, we’ll go through these change detection strategies and talk about some common pitfalls.
What is change detection?
Change detection is a feature specific to Angular. More accurately, it’s a process used to detect changes in the application state and update the view accordingly.
When an event occurs in an Angular application (i.e. user clicking a button or user changing the value of an input field), Angular runs change detection to check if there is any change in the application state.
The change detection process works by traversing the component tree in the application. It starts from the root component and checks for changes in each component. It will check for all changes in the component state and DOM elements.
In short, Angular will compare current and previous values of properties and variables defined in the component class and used in the component template.
Strategy #1: Default change detection
By default, Angular will use the CheckAlways change detection strategy. How does this work?
Angular uses a process called dirty checking to compare the current values of component state and DOM elements with their previous values. When an event occurs, Angular will run change detection to check for any changes in the template expressions in the component tree.
These expressions can be, for example, property binding, event bindings, or interpolation expressions. And as it goes, if there is a change detected, Angular will update the view.
When using Angular’s default change detection strategy, it will check every component in the tree on every event, even if no changes occurred. This may not be your best option because this can lead to performance issues. And if you have a large number of components or nested components in your Angular application, performance issues are more likely to occur.
Strategy #2: OnPush change detection
Luckily, a different change detection strategy exists. If you want to improve the overall performance of your Angular application, try using the “OnPush” change detection strategy, known as CheckOnce.
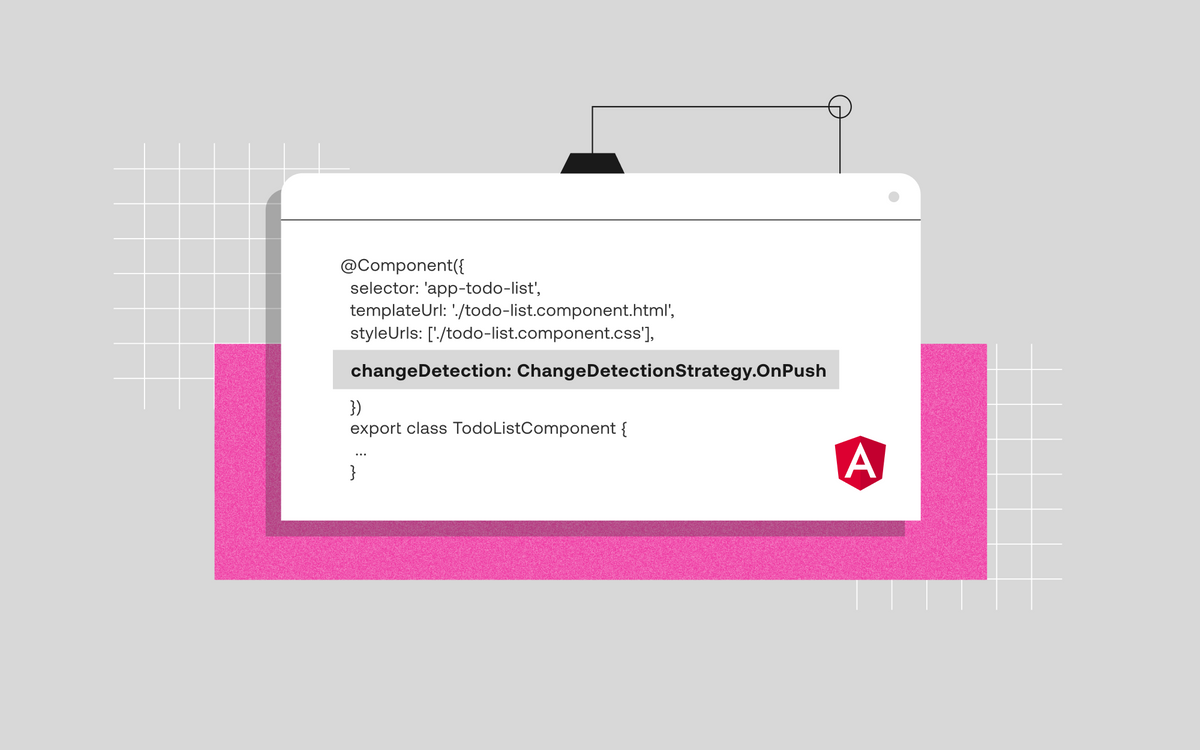
To use the OnPush strategy simply set the changeDetection property of a component to ChangeDetectionStrategy.OnPush in the @Component decorator.
@Component({
  selector: 'app-todo-list',
  templateUrl: './todo-list.component.html',
  styleUrls: ['./todo-list.component.css'],
  changeDetection: ChangeDetectionStrategy.OnPush
})
export class TodoListComponent {}

_____
todo-list.component.ts
With the "OnPush" strategy, change detection is only run on a component if one of its input properties has changed or if an event has been fired from that component.
This means that if none of a component's input properties have changed and no events have been fired, Angular will skip change detection for that component and its descendants.
Using the “OnPush” change detection strategy will reduce the number of components that need to be checked during change detection. Consequently, this leads to an improvement in overall performance of your Angular application.
Angular DevTools
To explore these strategies, we’ll be using Angular DevTools. In short, that is a browser extension providing us with debugging and profiling capabilities for Angular applications.
In the extension, there are two tabs - Components and Profiler:
- Components tab - explore components and directives in your Angular application, preview or edit their state
- Profiler tab - profile your application, understand where the performance bottlenecks are during change detection execution
Example app
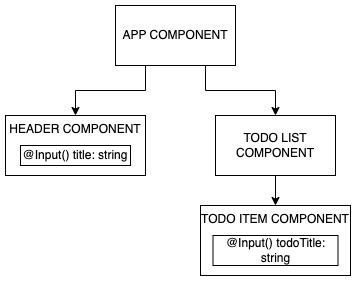
To better understand the difference between these change detection strategies, here’s a simple example app that displays a list of to-do items.
The header title can be changed using a text input rendered in the app component. Also, you can update a single to-do item by clicking on a button rendered in the to-do list component.
Updating component @Input() using default strategy
Let’s update the header component title input by using the text field rendered in the app component.
@Component({
  selector: 'app-root',
  templateUrl: './app.component.html',
  styleUrls: ['./app.component.css']
})
export class AppComponent {
  title = 'angular-cd'

  onTitleChange (title: string) {
    this.title = title
  }
}

_____
app.component.ts
<div class="app-container">
  <app-header [title]="title"></app-header>
  <div>
    <label>Title:</label>
    <input [(ngModel)]="title" type="text" /><br /><br />
  </div>
  <app-todo-list></app-todo-list>
</div>

_____
app.component.html
@Component({
  selector: 'app-header',
  templateUrl: './header.component.html',
  styleUrls: ['./header.component.css']
})
export class HeaderComponent {
  @Input() title: string = ''
}

_____
header.component.ts
<header>
  <h1>{{ title }}</h1>
</header>

_____
header.component.html
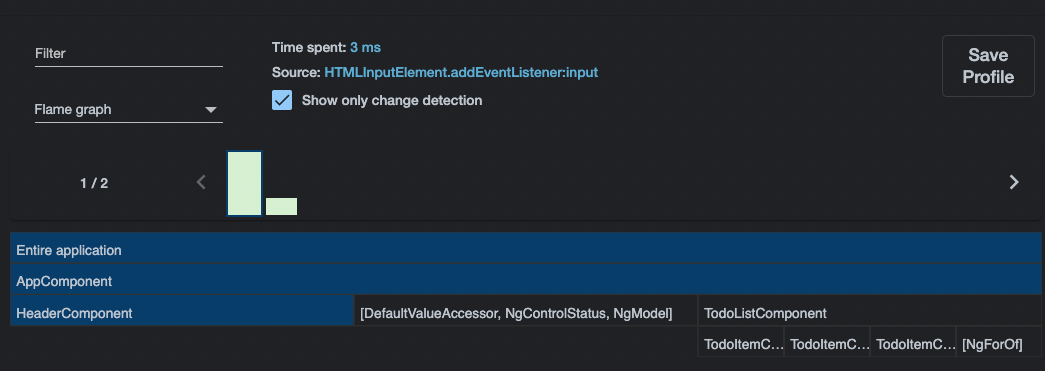
This action will be recorded with the Angular DevTools profiler. The profiler shows all change detection cycles and the components in which change detection was run during that cycle.
To see only change detections after recording, you need to select the flame graph and check the "Show only change detection" checkbox. Angular ran the change detection in components marked with blue colour.
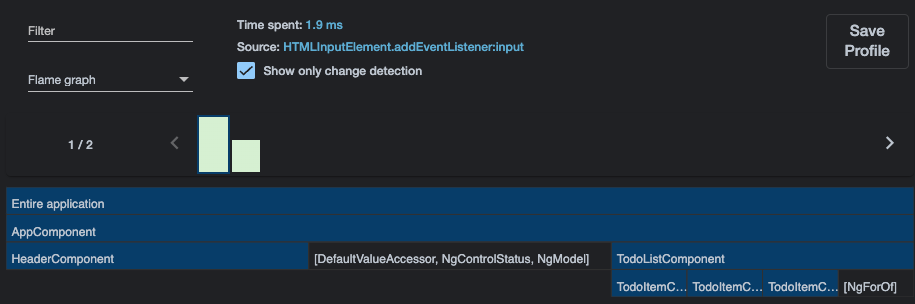
Picture 1.2 shows that change detection was run throughout the component tree, even though only the header component input was changed.
With the default change detection, all components with template expressions ran change detection, even when it wasn't necessary (e.g., TodoListComponent and TodoItemComponent-s in our example).
Updating component @Input() using OnPush strategy
Let’s apply OnPush change detection strategy to TodoListComponent.
import { ChangeDetectionStrategy, Component } from '@angular/core'

@Component({
  selector: 'app-todo-list',
  templateUrl: './todo-list.component.html',
  styleUrls: ['./todo-list.component.css'],
  changeDetection: ChangeDetectionStrategy.OnPush
})
export class TodoListComponent {
	todoItems: string[] = ['Title 1', 'Title 2', 'Title 3']
}

_____
todo-list.component.ts
<app-todo-item
  *ngFor="let todoItem of todoItems"
  [todoItem]="todoItem"
></app-todo-item>

_____
todo-list.component.html
Now let’s record the same action and look at the flame graph in picture 1.4.. Remember, Angular ran the change detection in components marked with blue colour.
Because we used OnPush detection strategy with TodoListComponent and since nothing changed inside TodoListComponent Angular will skip change detection for that component and its descendants.
What are some common pitfalls?
When using the “OnPush” change detection strategy, Angular will only do the comparison by reference and check for changes to the reference of an input property.
In other words, if you change the contents of the object itself, the change won’t be detected. This can potentially lead to some frustrating, hard-to-detect, bugs.
When you need to change the value of an input property, a better practice would be to create a new object with new values instead of updating the existing one.
This is why it’s sometimes recommended to build Angular applications using immutable objects and lists since we can use OnPush everywhere transparently. And please keep in mind that the “OnPush” strategy isn’t always appropriate for all situations.
It largely depends on how your application is structured, how your components “communicate”, and how data flows through your components.
Final words on change detection
To conclude, Angular’s change detection strategies provide you with powerful tools to optimize the performance and user experience of your application.
Even though using the default change detection strategy may be convenient, it’s often resource-intensive and can lead to unnecessary processing and performance issues.
On the other hand, OnPush change detection minimizes these drawbacks by triggering change detection only when necessary. While using the OnPush strategy is generally recommended, be aware of the potential pitfalls.
If you understand the challenges and capabilities of the OnPush strategy and implement best practices, you can fully leverage its benefits and create high-performance, responsive Angular applications.
In case you’re looking for help with your Angular application, feel free to reach out at hello@prototyp.digital and let us know how we can help!